Samsung Dryer Starts Then Stops: (7 Causes & 100% Fixed!)
Are you looking to get your Samsung dryer running smoothly again? With the right knowledge, troubleshooting a Samsung Dryer Starts Then Stops is simple and straightforward. In this article, we’ll explore why your dryer might be starting then stopping and provide easy-to-follow steps for getting it up and running in no time!
Samsung Dryer Starts Then Stops:
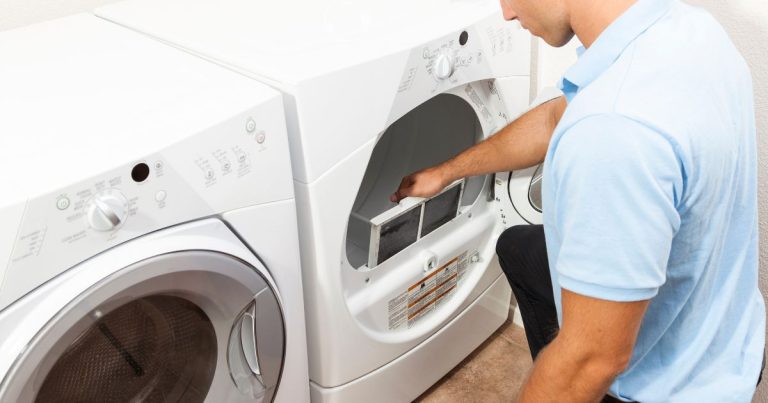
A Samsung dryer can start, only to stop soon after. This is usually caused by a clogged lint filter, which restricts air flow and causes the thermal fuse to blow, cutting off power to the motor. To fix this issue you should inspect your lint filter first before calling for service; make sure it’s free of any obstructions. If it looks fine, then check the vent hose behind the unit for any possible blockages as well as your home’s exterior wall vent outside – these are both common sources of restricted airflow that can cause a Samsung dryer to start-then-stop unexpectedly.
What 7 Causes a Samsung Dryer to Start Then Stop?
Samsung dryers are reliable machines, so when they start then suddenly stop it can be alarming. To troubleshoot the issue, here are seven possible causes of a Samsung dryer starting and stopping:
1. A faulty thermal fuse is one possibility;
if this part has gone bad it will cause your dryer to abruptly shut off after running for only a few minutes.
2. The drum belt may be stretched or worn out;
if this happens the motor won’t have enough power to turn the drum, which in turn results in sudden stoppage.
3. Too much lint built up inside:
If there is too much lint built up inside of the Samsung dryer’s venting system, this could contribute to overheating issues that would lead to short cycles before shutting down completely.
4. Another common problem is an airflow obstruction due to clogged filters or vents;
if air isn’t able flow freely through these areas then heat build-up will occur and cause your machine to overheat quickly and cut off its cycle prematurely.
5. Weak wiring connections:
Weak wiring connections can also cause problems with proper functioning as well as a potential fire hazard – make sure your wires are properly connected when inspecting any parts that need replacing!
6. Malfunctioning timers:
Malfunctioning timers can affect how long a cycle runs by not allowing enough time for clothes drying – replace old timers with new ones if needed .
7. Loose door switches:
Finally, you should check for loose door switches which allow electricity from entering into the interior of your machine when opened – fix them accordingly if found loose!
How to Reset the Dryer’s Control Panel?
Resetting the control panel of a Samsung dryer is a simple procedure that can be done in just a few steps.
- The first step is to unplug the dryer from its power source and wait for at least 30 seconds before plugging it back in.
- Secondly, press and hold both the Start/Pause and Power buttons simultaneously until all lights on the control panel turn off.
- After this, all settings will have been reset to their factory defaults and any error codes should be cleared from memory.
It’s important to note that some models may require additional steps such as holding down other button combinations or pressing specific buttons multiple times.
If you are having difficulty resetting your dryer’s control panel, consult your user manual for detailed instructions or contact customer support for further assistance.
Once you’ve successfully reset your Samsung dryer’s control panel, check if the issue has been resolved by running a test cycle with an empty load of clothes to see if it starts up properly without stopping again unexpectedly.
Troubleshooting Common Issues with a Samsung Dryer:
Troubleshooting common issues with a Samsung dryer is relatively simple, but it helps to understand the different components involved.
The most frequent problems typically involve either the heating element or thermostats in the unit.
When a Samsung dryer starts then stops unexpectedly, it could be due to thermal fuse failure.
This small device is located on the exhaust duct and works as an extra safety measure to protect against overheating. If this fuse has tripped, you will need to replace it before your machine can function properly again.
Another issue that may cause your dryer to start up then shut off abruptly could be related to lint build-up inside the vent line and drum of your machine.
To prevent this from occurring regularly, make sure you clean out any lint build-up after every few cycles of use and run regular maintenance checks on all removable parts such as belts or filters.
If these solutions don’t seem to fix your problem, there may be something wrong with one of its thermostats or sensors which control temperature levels while drying clothes.
It’s important that they are functioning correctly so they can keep track of how hot things get during a cycle; this will help avoid any potential overheating scenarios that could damage clothing items and other components within the appliance itself.
A qualified technician should always inspect these parts when troubleshooting problems with a Samsung dryer in order to ensure proper performance going forward
Diagnosing Heating Problems in a Samsung Dryer:
Diagnosing heating problems in a Samsung dryer is an important step to take when troubleshooting issues.
It could be the cause of why your Samsung dryer starts and stops during its cycle.
First, inspect the power source and check for any loose connections or tripped circuit breakers that may have caused an interruption in power supply. You should also make sure that the thermal fuse is still intact.
A damaged or blown thermal fuse can prevent heat from reaching the drum, causing it to stop spinning after starting up momentarily.
Second, ensure that all hoses connecting to the dryer are securely attached and not clogged with lint buildup which could impede airflow through the unit.
Ensure there are no blockages preventing proper air circulation within the unit itself as well as outside of it such as curtains blocking vents near windows or furniture obstructing exhausts outside on walls or roofs etc.
Finally, if all other components appear to be working properly you may need to replace either (or both) heating element(s).
To determine this you will need access to diagnostic tools like ohmmeters and/or voltage meters which can measure resistance between terminals while they’re receiving energy from a power source – this helps identify faulty parts more accurately than simply visual inspection alone.
Replacing the Thermistor on Your Samsung Dryer:
Replacing the Thermistor on Your Samsung Dryer is an important part of maintaining your machine and ensuring its longevity.
If you find that your dryer starts, then stops during a cycle, it could be caused by a faulty thermistor.
The thermistor monitors the temperature in the dryer drum and sends signals to the control board to adjust for proper drying temperatures.
In order to replace a faulty thermistor, you’ll need to locate it first. On most Samsung dryers this can typically be found behind or inside of the back panel along with other electrical components associated with controlling heat levels in your machine.
Once located, disconnect any wiring from both ends of the component then carefully remove it from its place within your dryer before installing a replacement unit of identical make and model number as recommended by Samsung for optimal performance.
After replacing the defective piece, reassemble all of the components properly and double check connections before turning on power again so that you won’t run into safety issues while operating your appliance down line.
A combination of regular maintenance checks and parts replacements like this can go a long way towards keeping your Samsung Dryer running smoothly for years to come!
Unclogging Your Venting System for Proper Air Flow:
Unclogging Your Venting System for Proper Air Flow is a critical step when troubleshooting issues with your Samsung dryer.
Improper air flow can cause the dryer to start, then stop due to lack of heat and drying time.
Regular maintenance on your venting system is key in avoiding this issue. You should clean out any lint or debris that has built up over time in order to keep airflow consistent and uninterrupted while using the dryer.
To do this, disconnect the duct from both ends at least twice a year and clear away any dirt or blockages you find inside.
Additionally, make sure ducts are properly sealed and secured so they don’t come apart during operation.
If there is still an issue after cleaning out the vents, it could be caused by too long of a run between where the vent exits outside and where it connects to the appliance itself.
The longer these measurements are, the more likely it will be that air gets backed up in your system causing disruption to drying time cycles as well as energy efficiency problems down the line.
If you suspect this may be an issue for you, contact an expert who can help determine if re-routing is necessary for proper air flow performance
Installing New Parts on Your Samsung Dryer:
Installing new parts on your Samsung dryer is an important step to take when it starts then stops. In some instances, replacing a faulty part can help restore the dryer’s performance and prevent further damage from occurring.
Before you start installing any new parts, make sure you have unplugged the dryer from its power source and discharged all remaining electricity in the unit by pressing down on the power switch for at least two minutes.
Additionally, if you are unfamiliar with how to correctly install or replace a part of your Samsung dryer, it may be best to contact a qualified service technician for assistance before attempting any repairs yourself.
When buying replacement parts for your dryer, always purchase genuine OEM (Original Equipment Manufacturer) approved components that comply with stringent industry safety standards as they will provide more secure installation than off-brand replacements.
It is also advisable to inspect each component upon arrival so that you can ensure there are no manufacturing defects present before continuing with installation.
Professional Repairs for Complex Drying Problems:
Professional Repairs for Complex Drying Problems When a Samsung dryer starts then stops, it can be indicative of complex drying problems.
Professional repair services are recommended to address these issues and ensure the dryer is running efficiently and effectively.
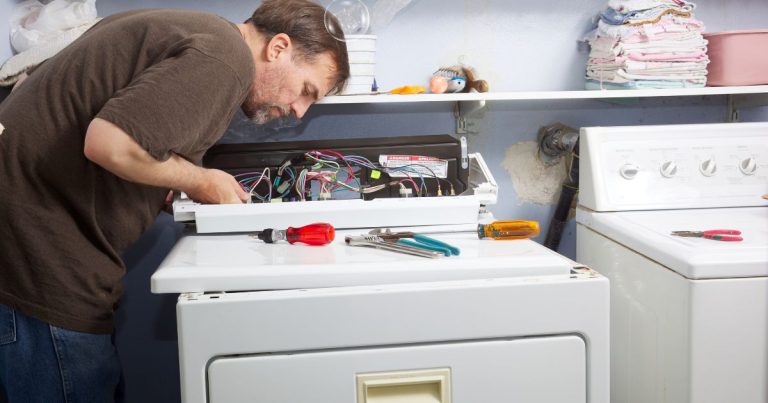
A professional will be able to identify the underlying cause of the problem, such as a faulty heating element or broken belt, and make the necessary repairs.
Furthermore, they can provide advice on how to best maintain your dryer in order to avoid future breakdowns or malfunctions.
Common causes that may lead to a Samsung dryer starting then stopping include inadequate airflow due to an obstructed venting system; blockages leading to poor heat distribution.
Or worn out belts resulting in insufficient power transfer from motor pulleys driving components like drum rollers.
Troubleshooting each component requires specialized tools and knowledge as well as experience with individual models.
Therefore professional repair services are advised for accurate diagnosis and effective resolution of any issues encountered with a Samsung dryer.
Regular maintenance checks by experienced technicians is key in prolonging the lifespan of any appliance including those from Samsung Dryers range.
During inspections, all components will be checked for proper operation so that minor faults can be identified early on before more costly repairs become necessary down the line
Conclusion:
Overall, the Samsung dryer is a great appliance that can provide you with years of reliable service.
However, if your dryer starts then stops, it could be a sign of a more serious issue.
It is important to take the time to troubleshoot the problem and determine the cause.
If the issue is a simple one, such as a clogged lint filter, then you can easily fix it yourself.
However, if the issue is more complex, such as a faulty heating element, then it is best to call a professional for help.
Taking the time to properly diagnose and repair the issue can help you avoid costly repairs in the future and ensure that your dryer continues to provide you with reliable service.

